31
2016Too Many Stops?
Shot of the Month – May 2016
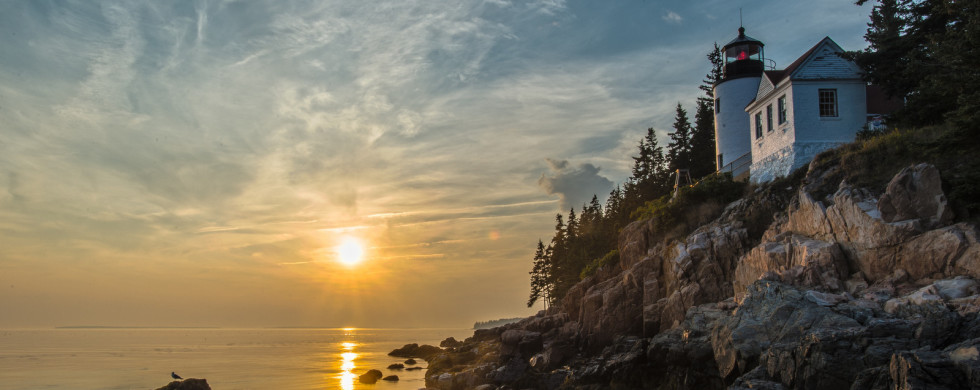
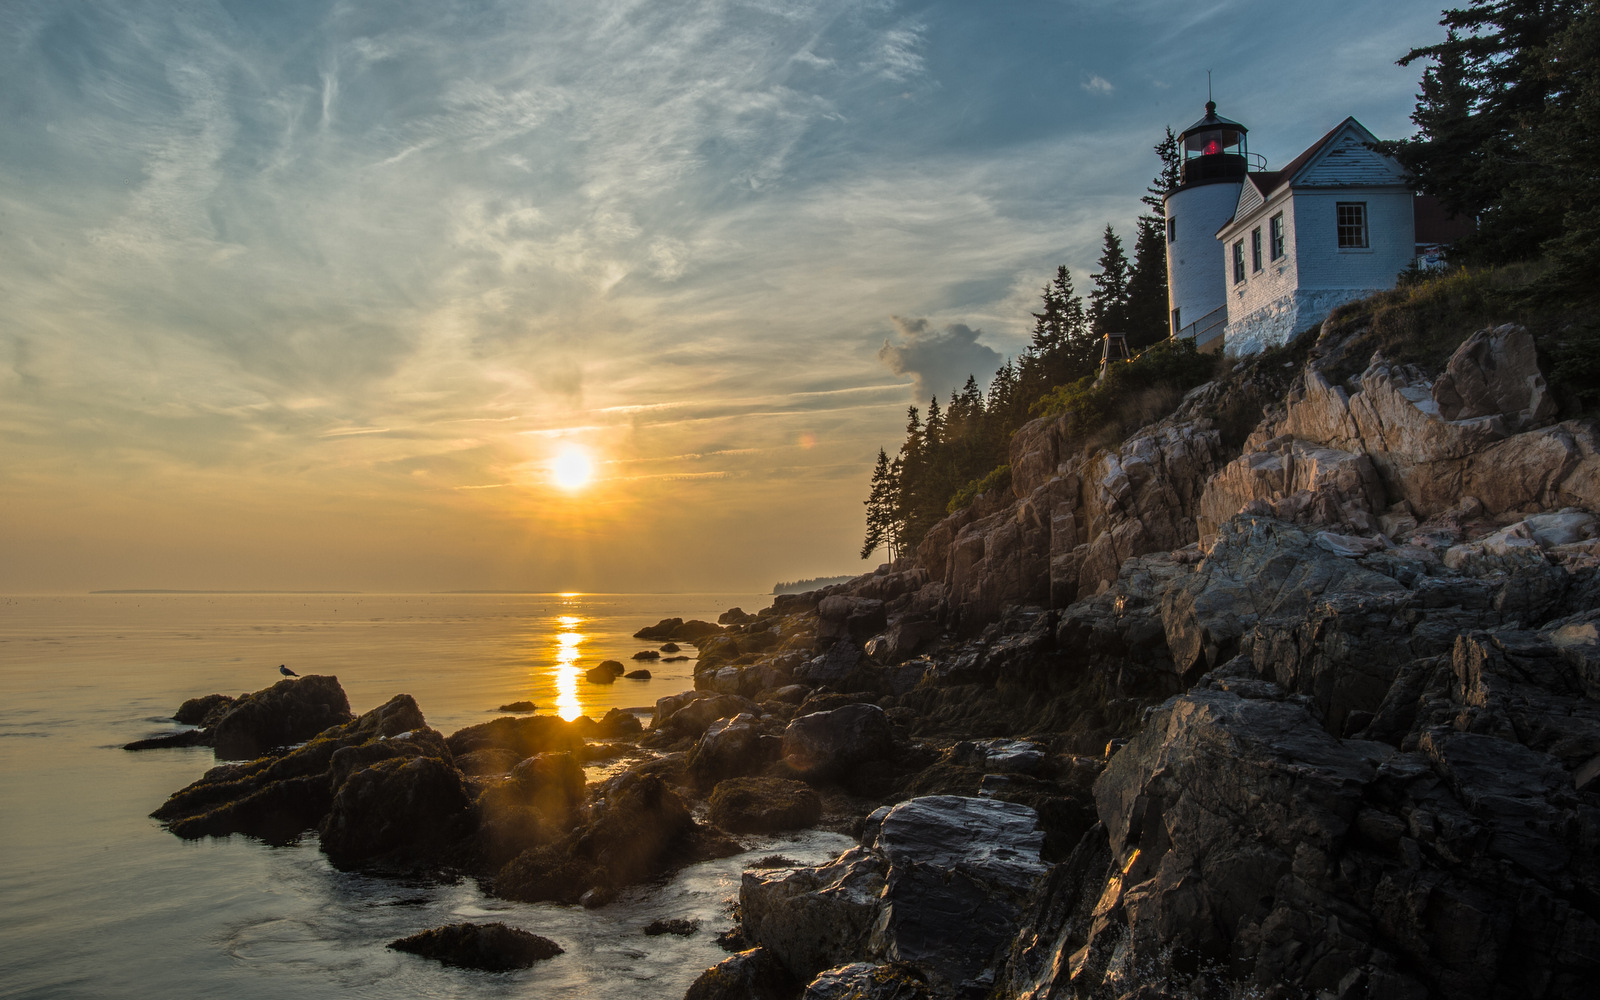
Did you know that it is impossible to take this picture, as shot, with today’s cameras?
Uh, you mean the one I am looking at right now.
Yes, that one.
The one that doesn’t exist.
Exactly.
Scratch head…
Photographic equivalent of “Who’s on First?” (If you have never heard this, stop now, and listen…Comedy Classic!)
Obviously, I did create the image so it does exist. However, this is not one picture but 7 that have been merged together to accurately represent the scene as I saw it with my eyes.
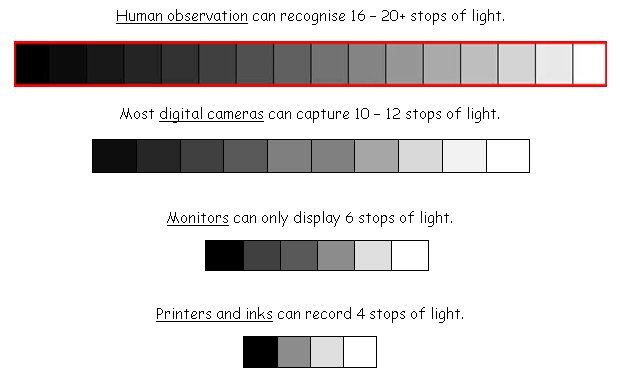
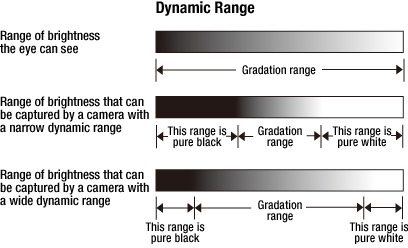
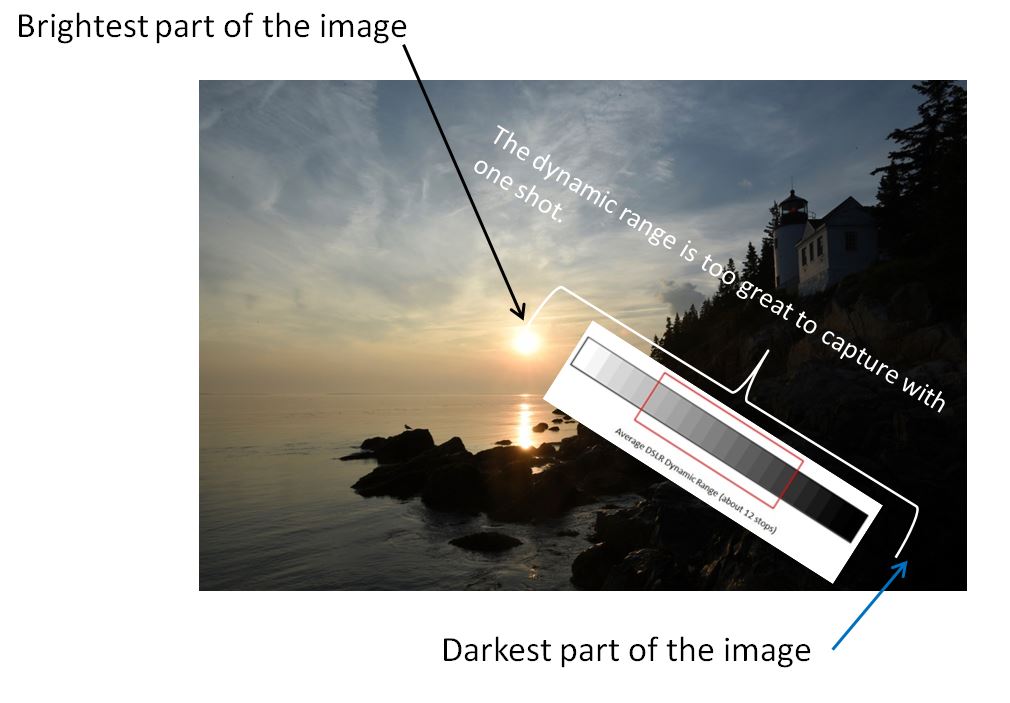
Today’s digital cameras are amazing, but they still cannot see the world as accurately as the human eye can, yet. Humans are capable of seeing about 24 different levels of brightness in a scene. In photo lingo, we would say that people can see close to 24 stops of light, or 24 Exposure Values (EVs). Today’s best cameras can see about 10-14 stops of light. Some scenes have a high dynamic range, meaning that there is a large difference in Exposure Values between the darkest shadows in the scene and the brightest highlights.
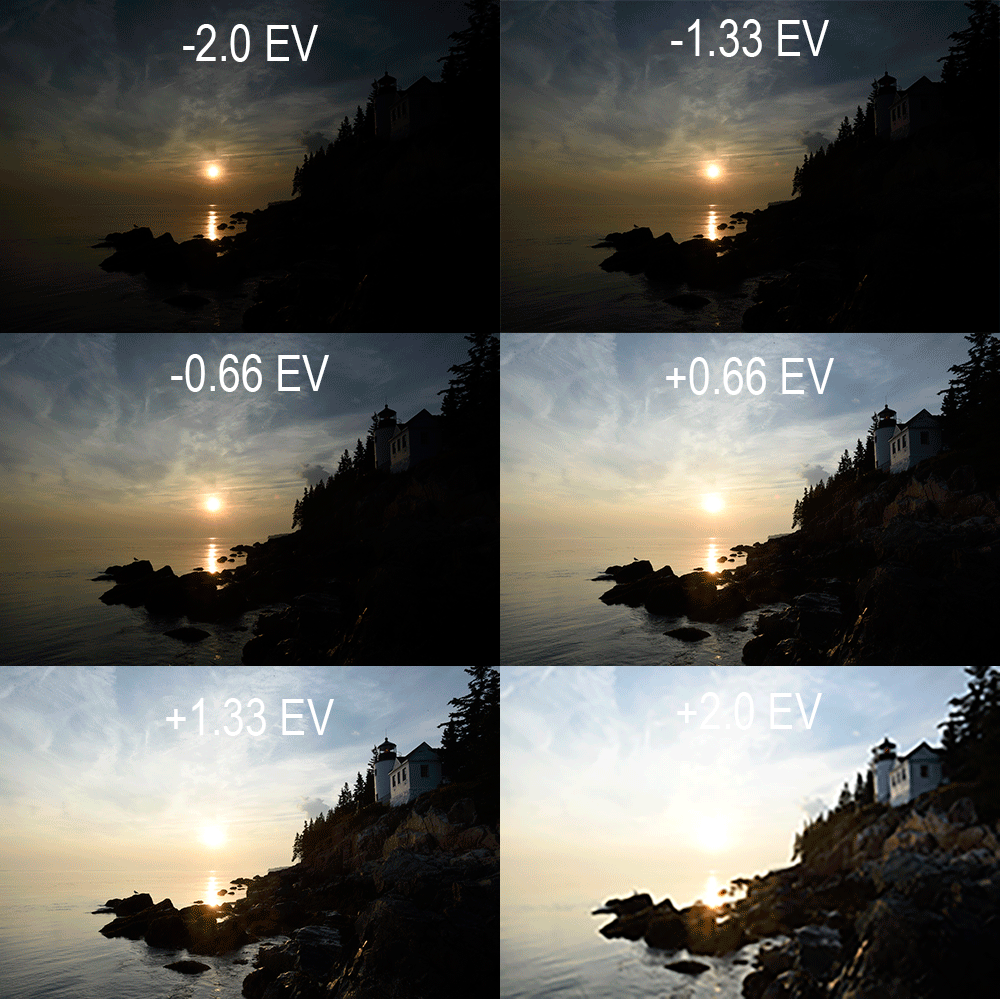
The dynamic range of this sunset scene is beyond the capability of my camera. I could expose for the sun (see the image below that was underexposed at -0.66 EV, but then the rocks in the lower right would be completely black – you would lose all the detail in that part of the picture. Or, I could set my camera to expose properly for the rocks, but then the sun would be drastically overexposed and just be a white mess (as you can see in the image below that was shot +2 EV ).
Pack up and go home? Nope. One solution is to use “High Dynamic Range (HDR) photography techniques. In HDR photography one takes multiple shots where each image is exposed differently to capture the full range of brightness levels in the scene. For this image, I took 3 shots that were increasingly “underexposed”, one shot that was “properly” exposed (the camera’s best guess under the circumstances), and then 3 shots that were increasingly “overexposed.” Here you can see each shot in a row, with the most underexposed image to the far left, and the most overexposed to the far right.
Through the wonders of software, I was able to merge these shots so that each area was properly exposed in the final image.
Typical scenes that will challenge the dynamic range of your camera include backlit scenes (strong sun behind your subject), bright skies, interiors (if there is a window present you will probably have a problem), and scenes that include a strong light source.
Most cameras have an “Auto-HDR” mode. Yes, iPhones and similar smartphones (Samsung Galaxy) have them. When faced with such a scene turn on the HDR function and see if it helps.
As you can see, although the technology keeps getting better and better (just a few years ago most cameras could only capture about 5 stops of light), we still have a ways to go before matching human eyesight. In the meantime, with proper use of HDR, you don’t have to let too many stops, stop you from getting that great shot.
Until next month….michael
P.S.
Here is an article that also explains dynamic range, amazingly, using the same scene as an example!
Also, did you notice the lone seagull on the rocks?
Bass Harbor Head Light Station, Acadia National Park, Maine
Nikon D4S, Nikon 17-24 mm (@ 24mm), f/22, ISO 200, variable shutter speed for 7 shots at -2 EV, -1.33 EV, -0.667 EV, 0 EV, +0.667, +1.33 EV, +2 EV


Gerry Magbity
Impressed with the explanation. I do have a hobby for pictures and now I get some understanding on taking pictures in such circumstances.
10 for 16 @ Michael Despines Photography
[…] A nice sunset in Yellowstone captured using the HDR technique. If HDR is jibberish to you, learn more here. […]
Landscape to Lovers @ Michael Despines Photography
[…] In my case I was running from one outcropping of rocks to another and frantically adjusting my tripod to find JUST the right position and composition. This tripod leg up a bit. This leg, down abit. That leg has to go over there. Nope, this leg is now too low. Raise again. Now the horizon is crooked. Adjust the camera. And all that is even before figuring out the proper exposure settings. Once the camera is in the right position I then run through a range of different shutter speeds and aperatures to find the best combination that can expose the bright sky while trying to keep the exposure on the building from going too dark. For this image I also took a series of shots at different exposure levels that I merged later with software to capture the full range of brightness in the scene. For more on how that is done, check out this post I did on photographing a lighthouse in Maine. […]